Today I’m sharing the second half of my garage storage post. I’m going to discuss vertical storage solutions and how these solutions will make better use of your space.
In my first post, I discussed extra garage storage that sits on the floor. This consisted of cabinets and shelving racks. Sometimes we have to use our floor space, but the space above is great real estate.
The best way to make your garage look cluttered is to fill the floor with all your stuff. Get it up, and off the floor, and it will look very orderly. Imagine, FINALLY, being able to walk through the space without tripping over something. Does that sound good to you? If so, read on for some handy tips.
The Problem- Cluttered Garage Floors
People often look at the perimeter of their space and place things along the wall and on the floor. If they would just look up, they would find tons of useable space!
I am guilty of doing the same thing. We line things up against the garage walls, and then start stacking. I know there is a better way, so I’m going to fix it.
Don’t you love it when you stack things on top of each other and have to move everything off the top in order to find something? Not fun!!

On the inside of your home, you probably wouldn’t use floor-to-ceiling space to store your items. But, in the garage, it’s a great (and often missed) opportunity for storage.
Solution #1- Vertical Storage Floor to Ceiling
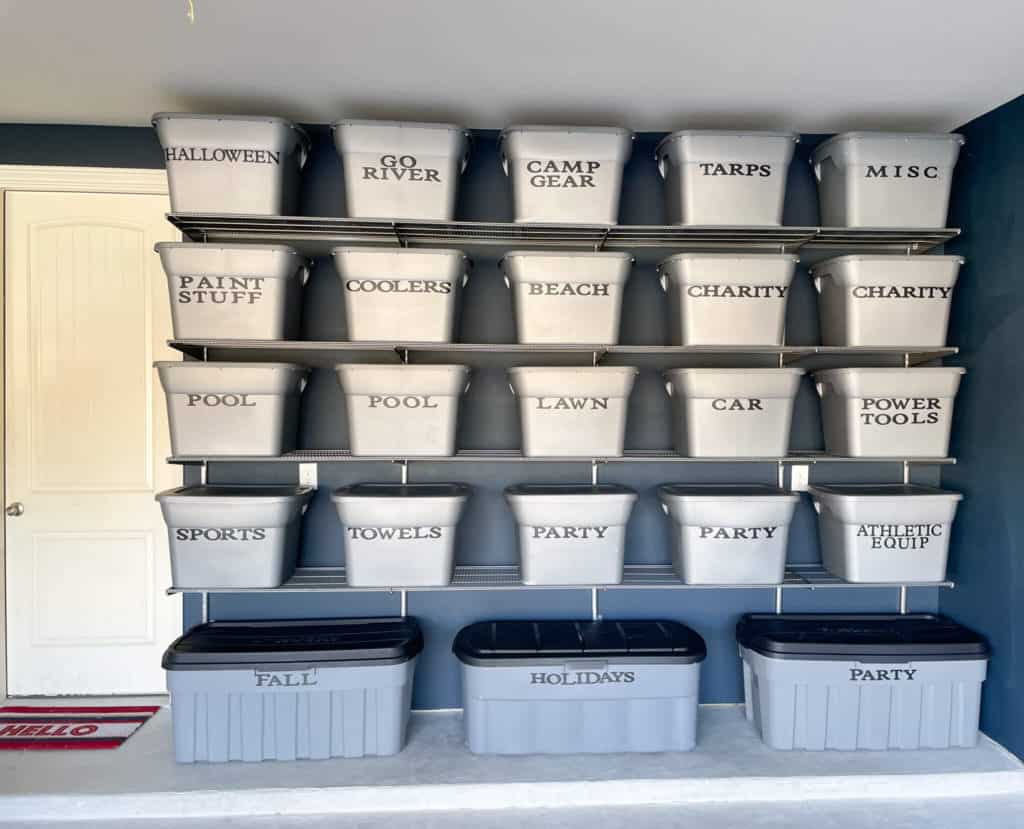
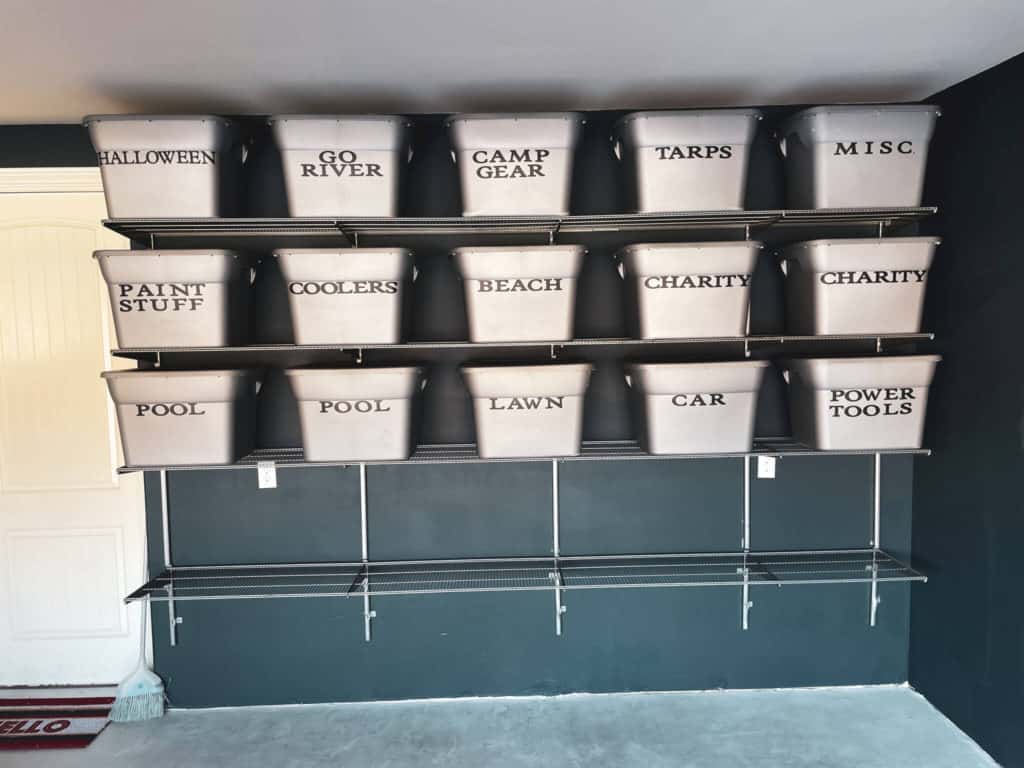
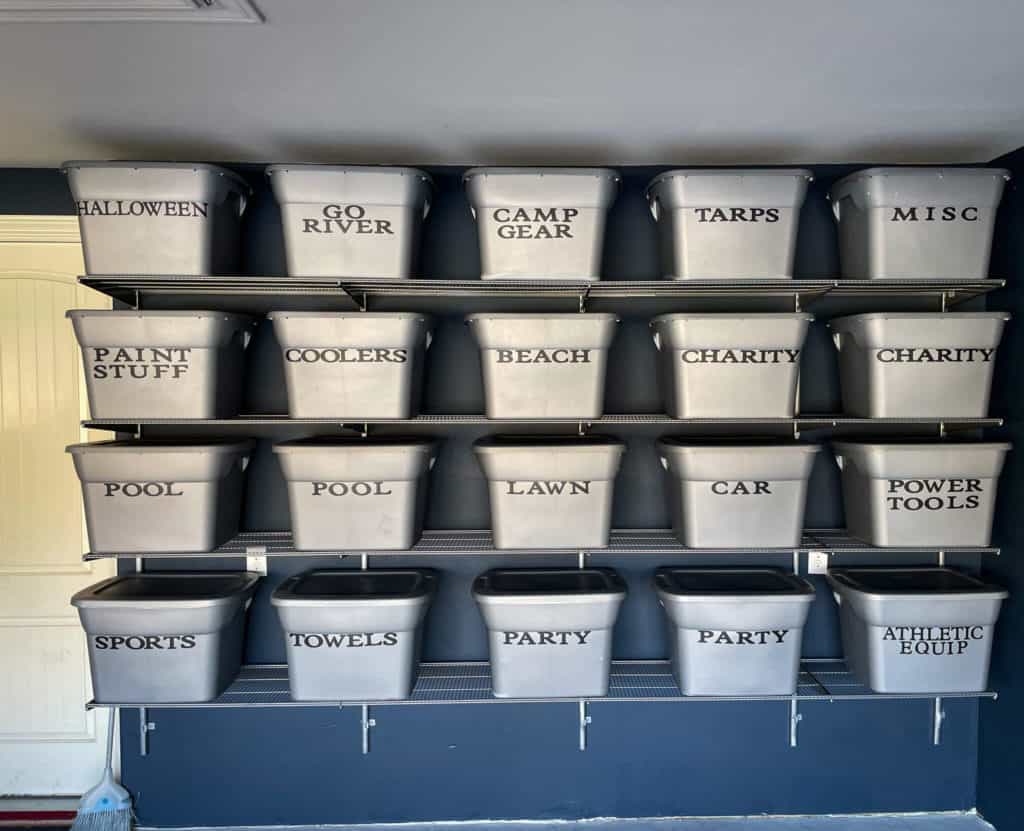
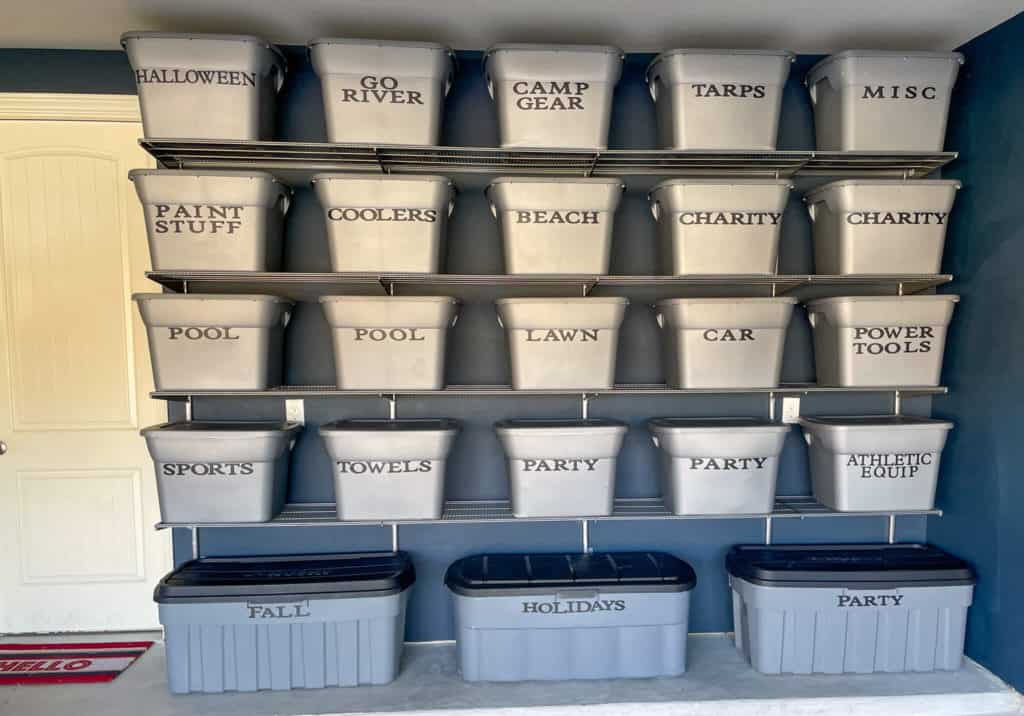
Ceiling storage isn’t your only option for vertical storage. You can take your shelves, hooks, baskets, and bins up your wall as high as your space allows. Today, I will share the wall of shelves I’m using to get things off my floor.
When I started working at The Container Store, I was vaguely aware of their Elfa shelving products. I was a loyal Container Store shopper, but I wasn’t in the market for garage or closet storage at that time.
During my time working there, I learned so much about the quality of Elfa products compared to other brands.
I admit it didn’t hurt that I had an employee discount to help pay for purchases. But, having left that job, I still purchase Elfa products (and pay full price). I’ve seen the other options on the market, and you get what you pay for in terms of quality.
There are some things too important to skimp on. The last thing you want is to spend your money on shelving that won’t stand the test of time (or weight).

I have two disclaimers. The first is that I am not getting paid for mentioning any of the products in this post. Secondly, I installed these shelves a while ago and I’m just now getting this post written. Since purchasing my Elfa parts, the company has changed some of the products. Everything functions exactly the same. The new pieces are much sleeker looking, in my opinion.
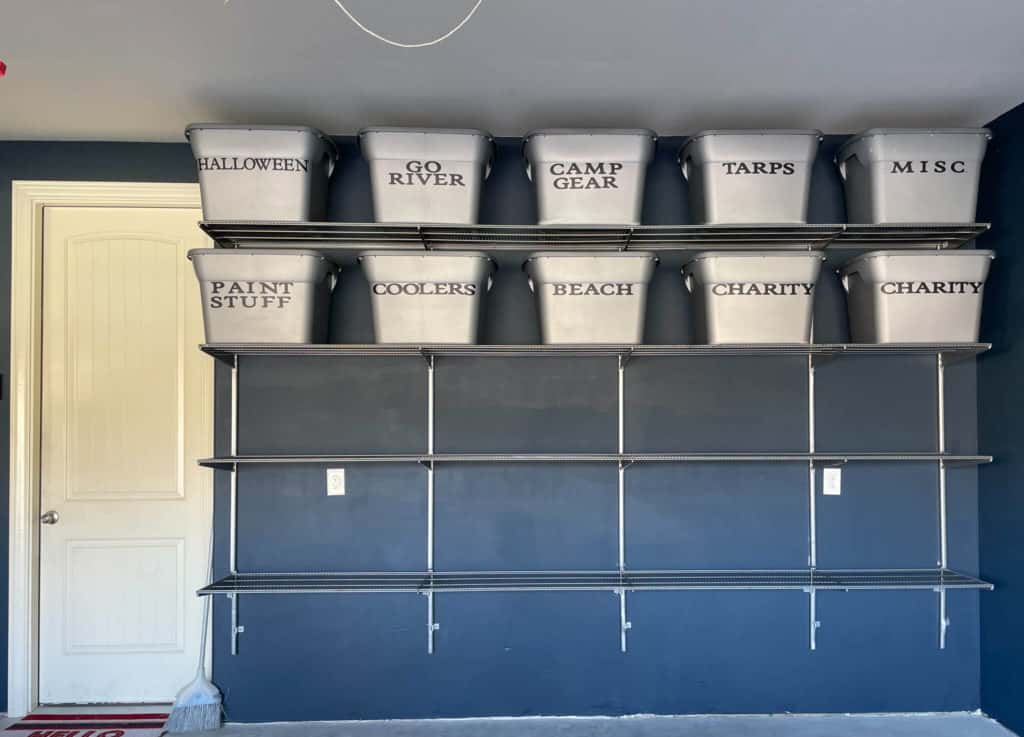
Having said all that, I can share my wall of shelving. Most garages have one full wall away from the garage door(s) where you can add shelving floor to ceiling. We happily took advantage of that wall in our garage.
One of the great features of Elfa is that you can install it yourself. It’s very straightforward, and there are many online resources (instructions and videos) to help. If DIY isn’t your thing, you have the option to have The Container Store send an installer out.
We had the time, so we decided to install the shelving ourselves. My husband and I made quick work of it.
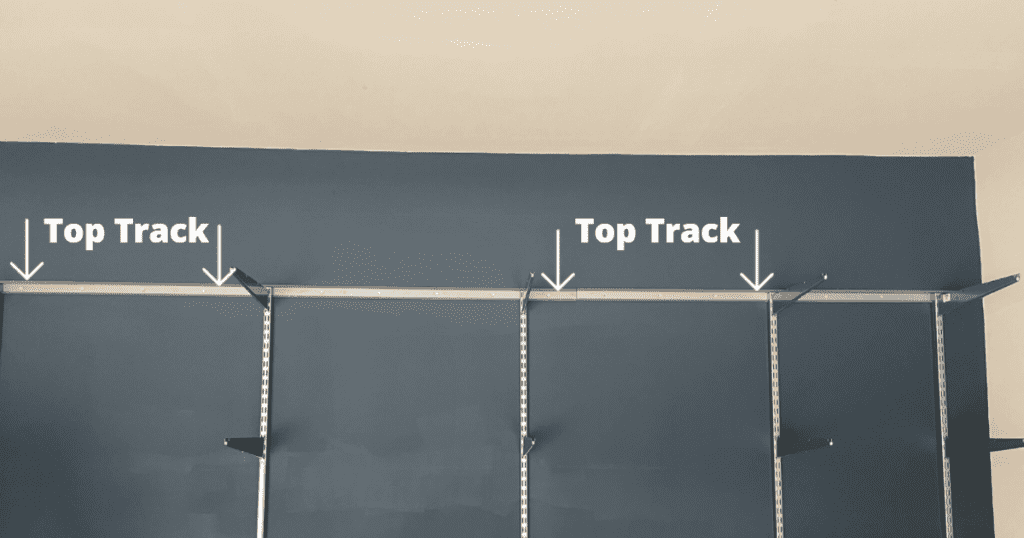
Surprisingly, the only part that needs to be screwed into the wall is the top track. All the weight of the vertical bars (standards), shelves, and content you put on the shelves are held by the top track. Of course, you’ll want to try to screw into a stud or two if you will be storing heavy items.
Next, you attach the standards onto the top track. Then, the brackets fit into the slots on the standards. You will probably move these around a bit to see how much space you’d like between your shelves.
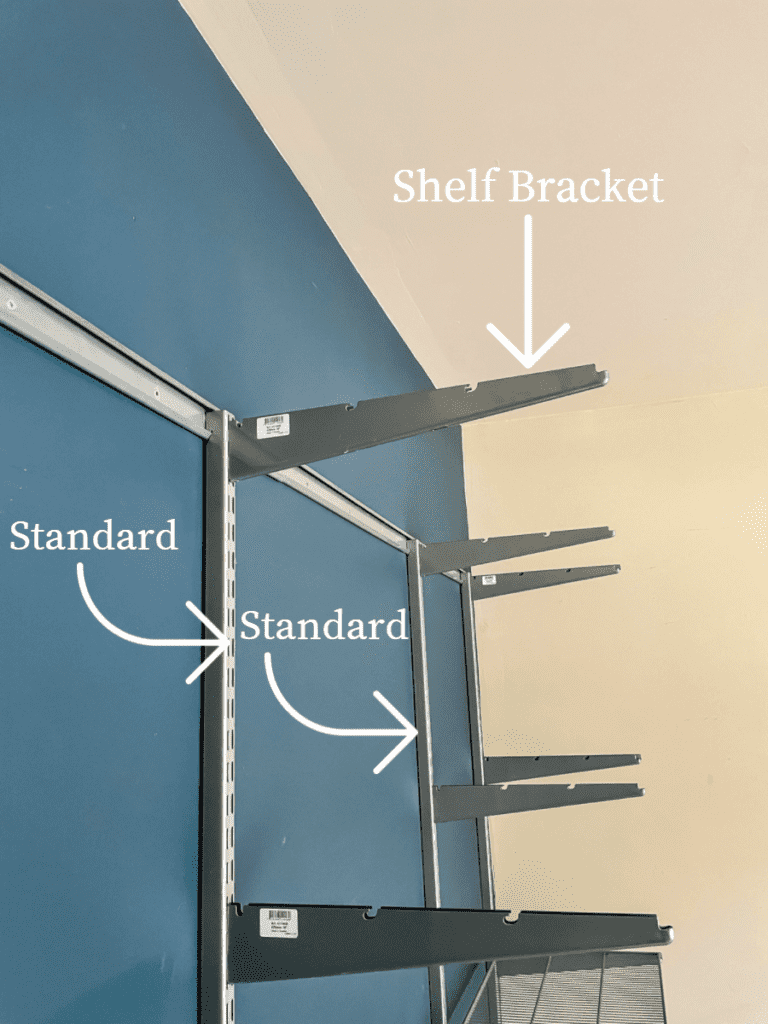
Finally, you snap your shelves into the brackets. It’s that easy!
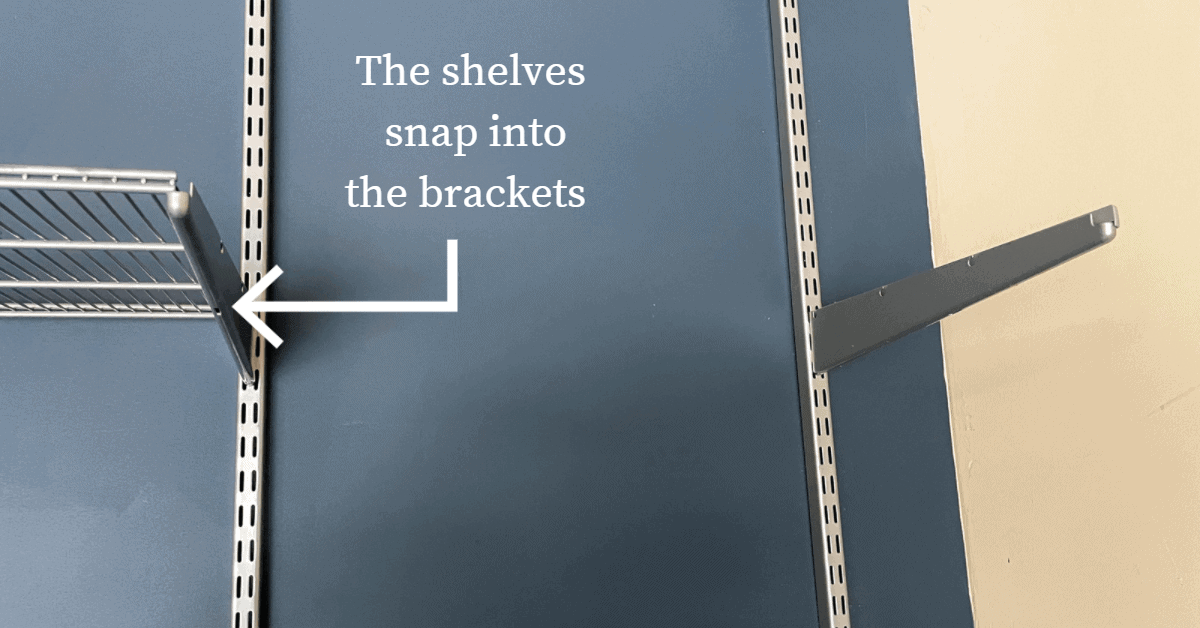
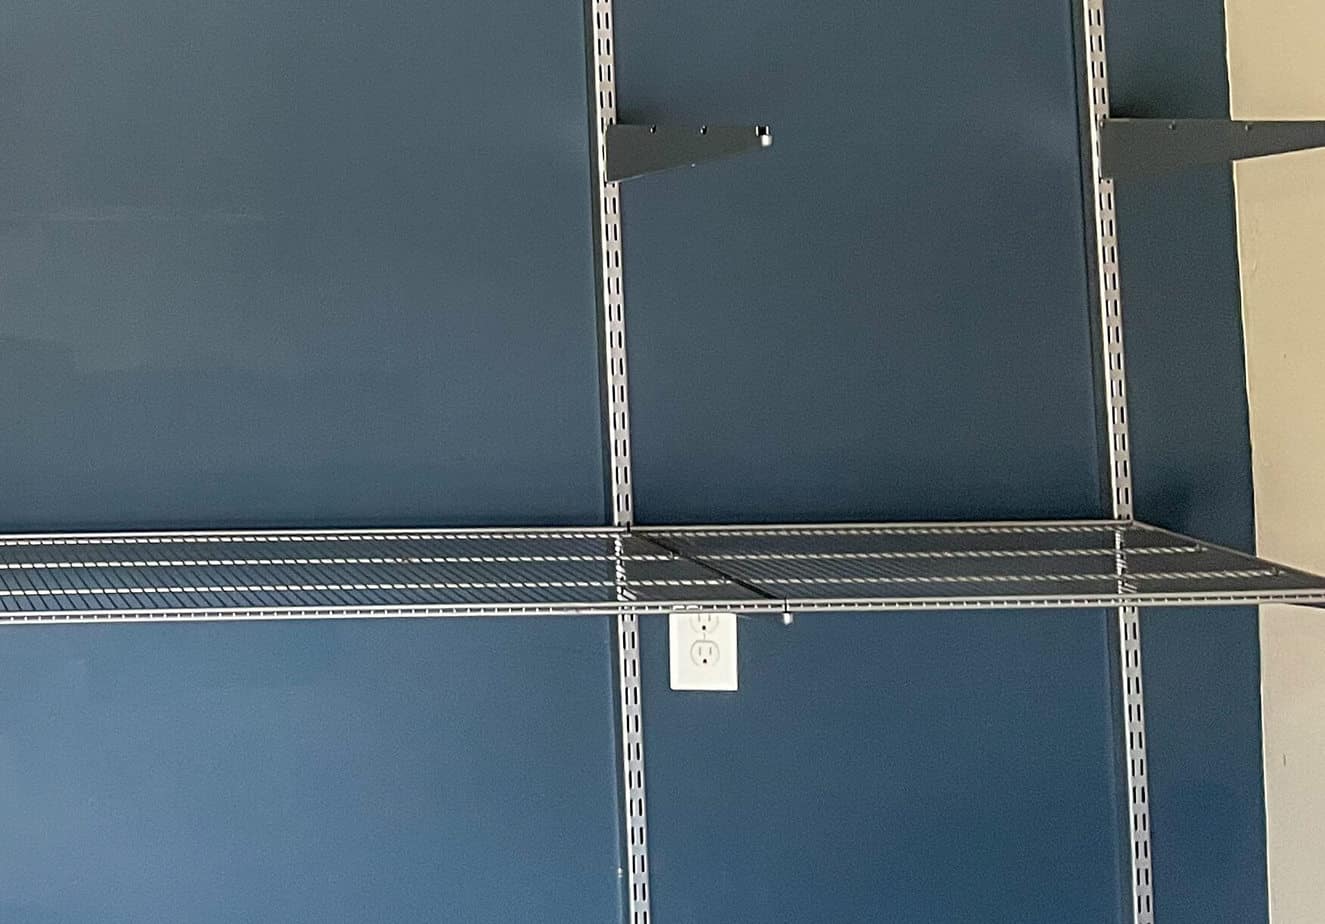
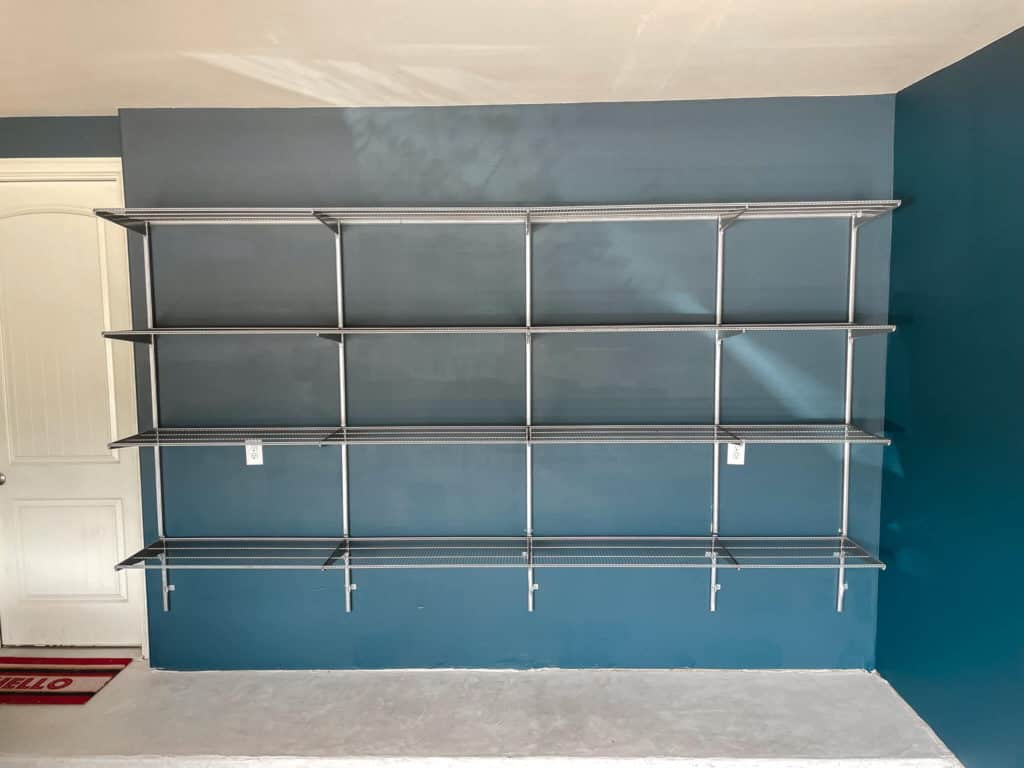
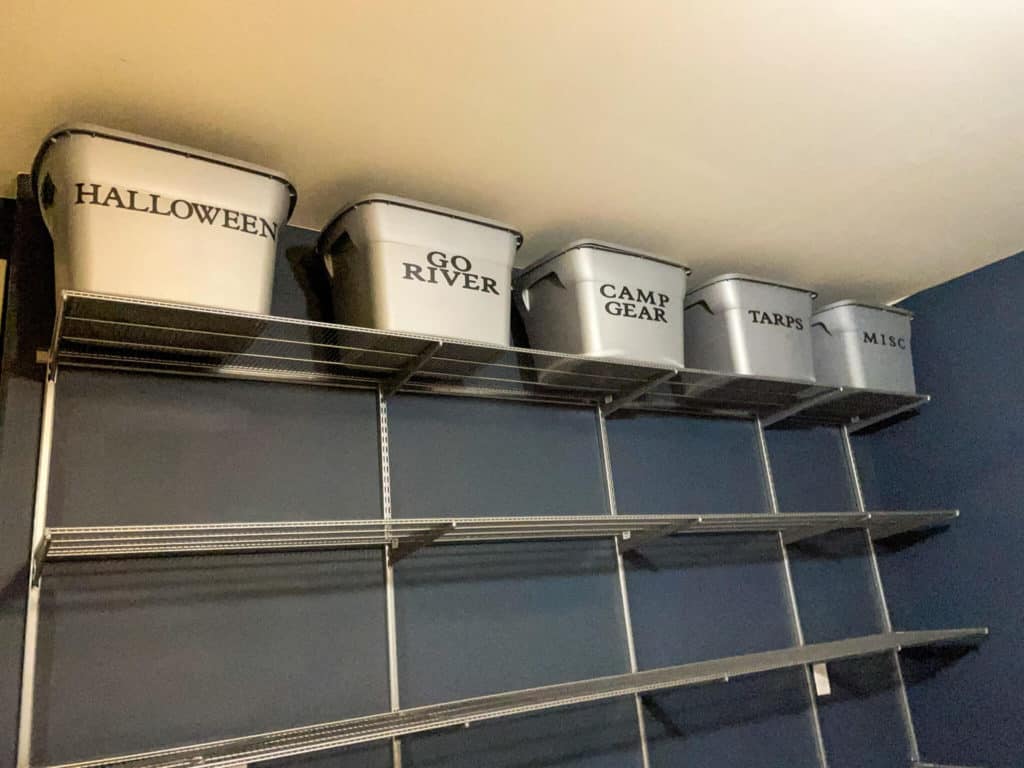
In the above photo, you can see that we used some products to finish off the unit and make it look cleaner. We used standard covers to cover all the holes that the brackets snap into. The other product we used is a top track cover. These will cover all the screws on your top track and make everything look streamlined.
Our old house had a very large, decked attic. We could store so much up there. That is not the case in our current house.
It is barely more than a crawl space. This wall of shelves will help solve our storage needs and make our items much easier to find.
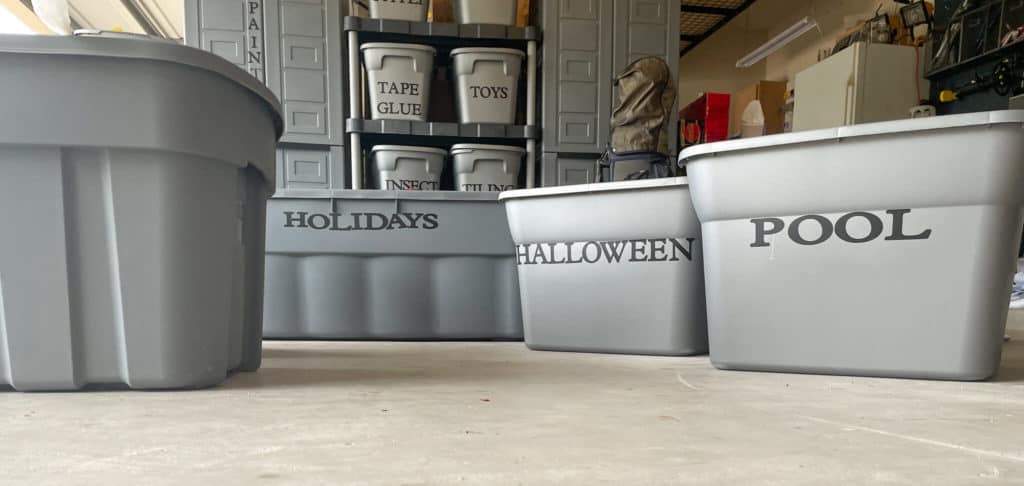
Next, I needed to decide what storage bins I would use to fill the shelves. Many people like clear bins so they can see the items inside. I am not one of those people.
If you categorize and label well enough, you don’t need to see inside. I usually go for opaque storage. In my opinion, it always has a cleaner look.
I decided on gray bins so they would match the storage products I shared in my first garage post. They are not available anymore, but these bins are almost identical.
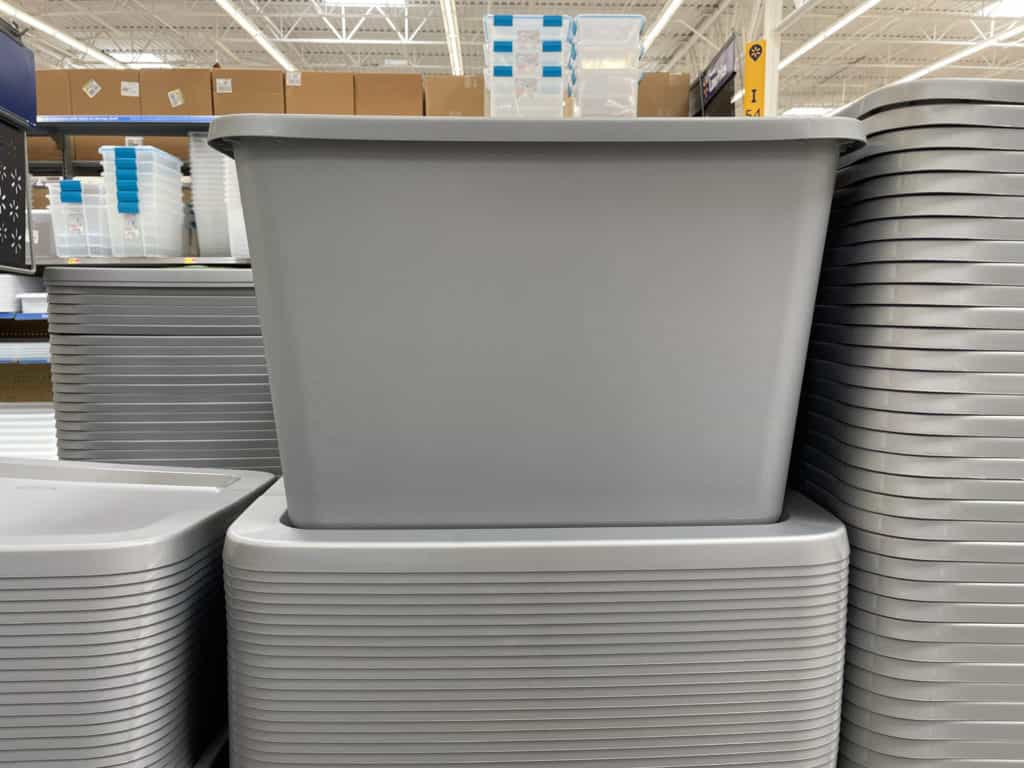
Going with gray/silver keeps things looking cohesive.
Next, I labeled each bin with Cricut labels.
We pulled out all our stuff and went through these steps:
- Toss items that are no longer useable
- Donate items we no longer need
- Sort the items we are keeping (categorize like items with like items)
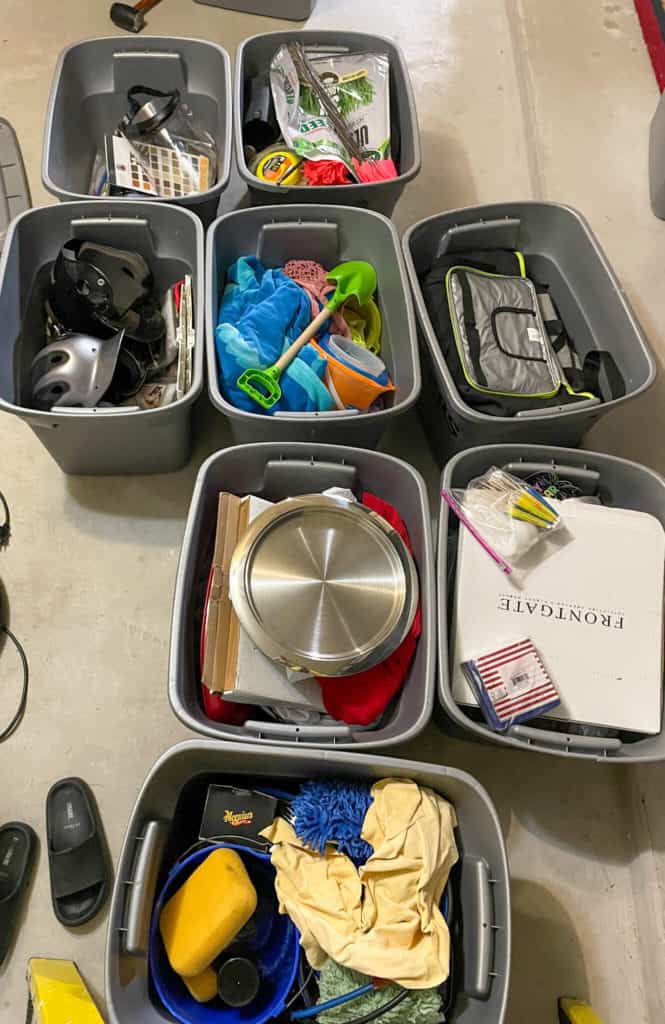
Once I organize the items into bins, we will load the shelves. When loading shelves, always put the stuff you use least at the top. It only makes sense to have the items you use most on the bottom shelf.
If any bin felt too heavy, I positioned it over a bracket for extra support. That is my own insecurity at work. During the four years I worked at The Container Store, I never heard of shelves collapsing. If you install it correctly, it will hold a great amount of weight.
I know I’ve said several times to get things off the floor, but sometimes you need to use floor space. For example, underneath my last shelf, I had room on the floor for more storage bins. Storing items in this area does not impede any walking or parking space.
Solution #2- Wall Track System With Storage Hooks
Another great way to get things off the floor is a top track with hooks. There are so many options for hanging your garage items. You can get hooks for everything from extension cords and bikes to yard tools and lawn chairs.
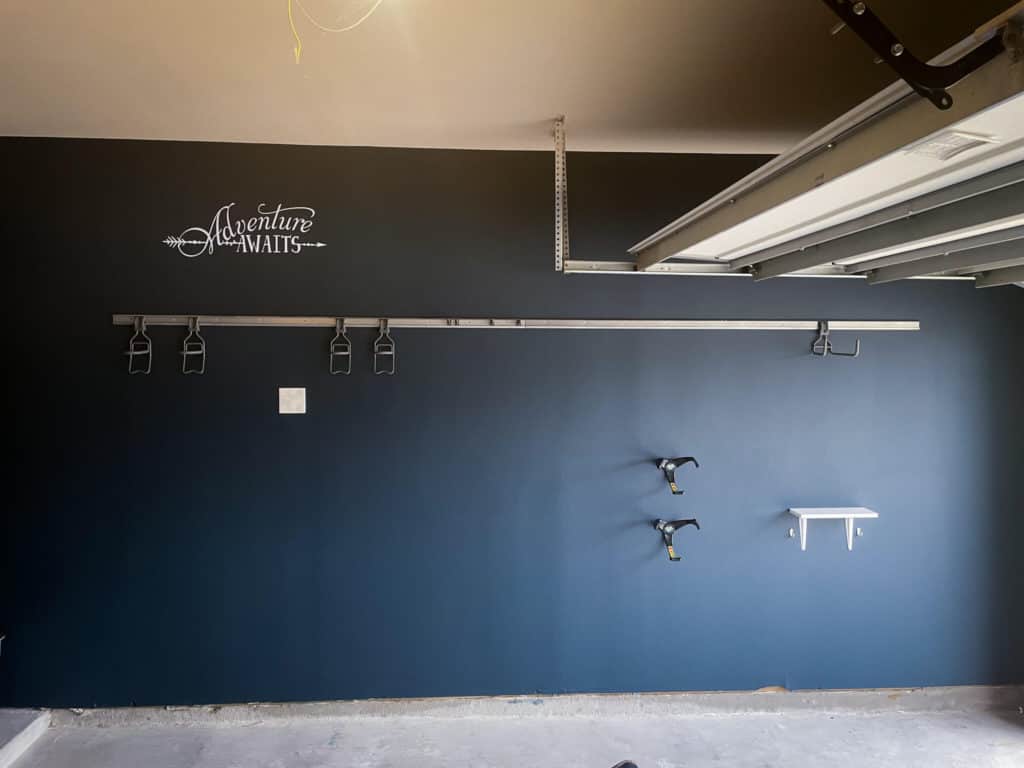
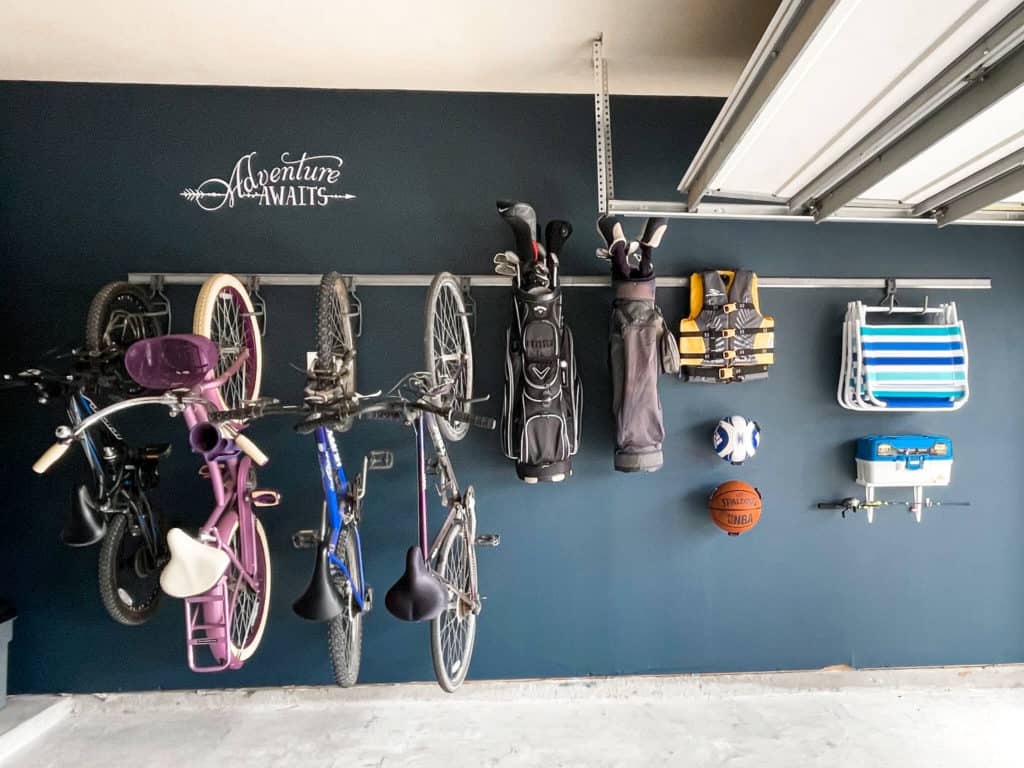
We love having our bikes and golf clubs up off the floor because it frees up so much space. I also purchased ball claws to hold our soccer ball and basketball.
My husband used some scrap lumber, small brackets from Home Depot, and two small curved hooks to hold my son’s fishing rod and tackle box.
Solution #3- Sport Specific Racks and Shoe Storage
You can squeeze vertical storage into a smaller space as well. We have this little wall next to the garage door leading into our house.
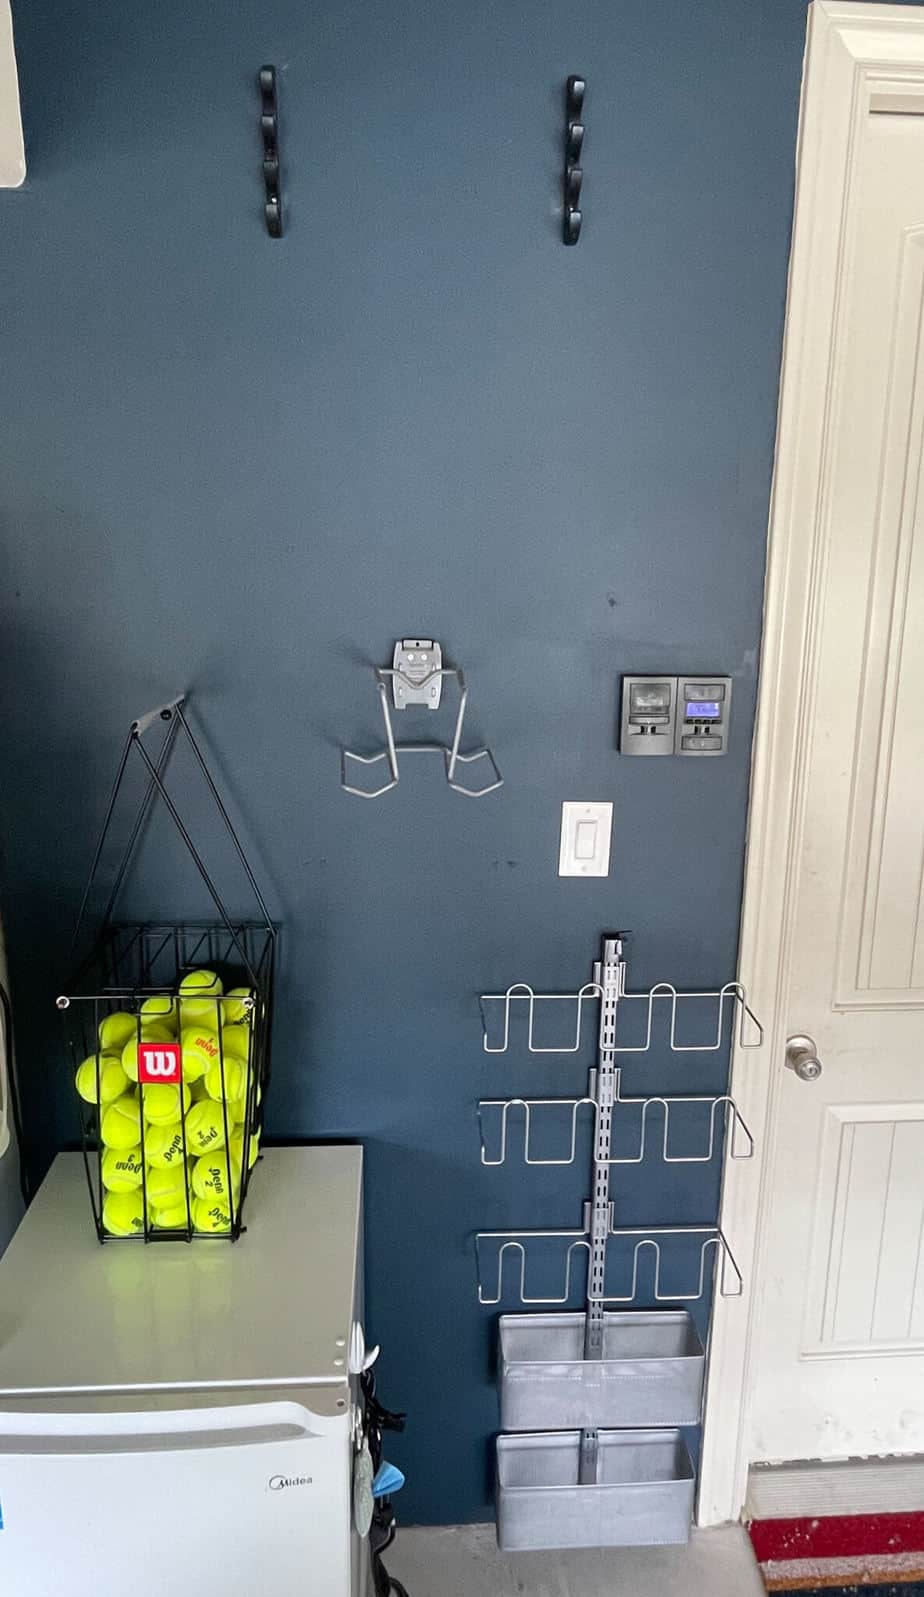
I wanted to store a few things on this wall, so I ordered some storage solutions from Amazon. We wanted storage for our hiking poles. These plastic racks work perfectly.
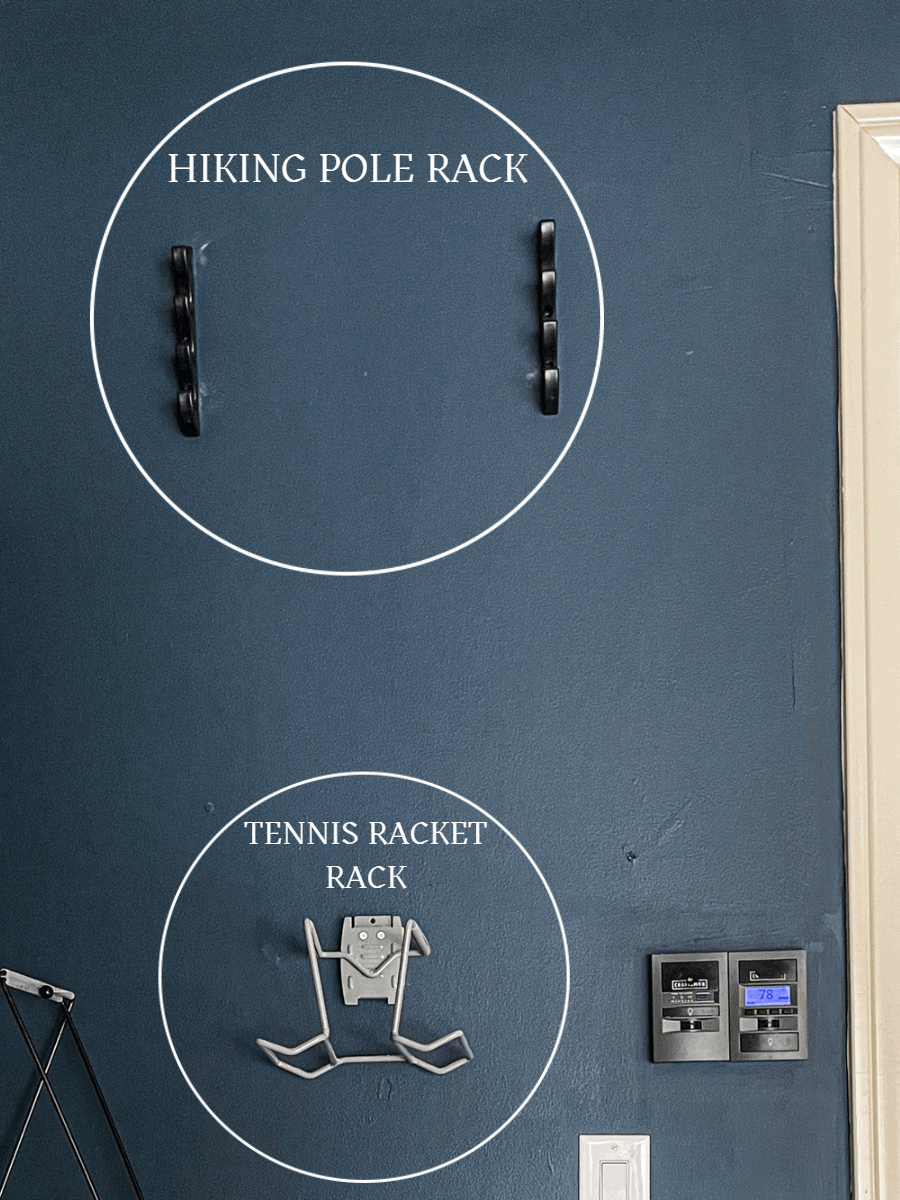
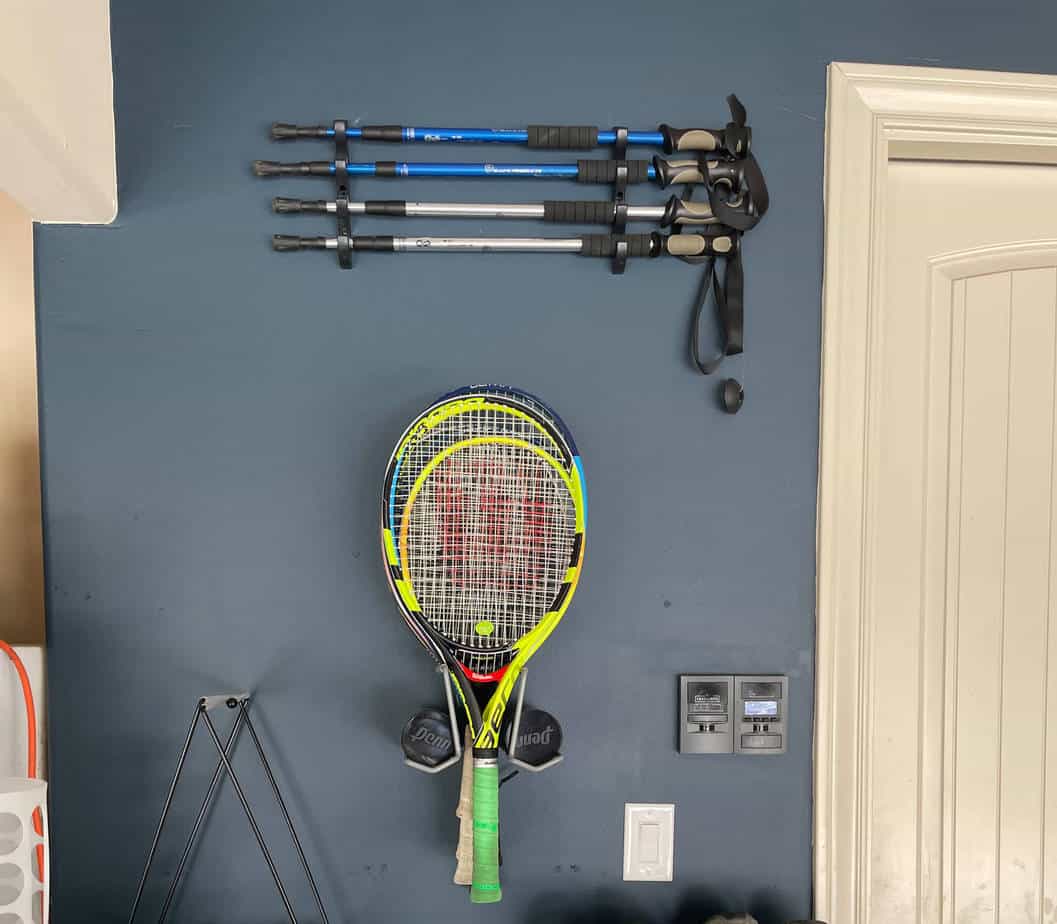
We also needed a unit for all our tennis rackets. The tennis racket holder is also from Amazon.
Before, when our kids got back from playing, they would lay their rackets down anywhere. Now that there is a dedicated spot for them, the rackets get put up where they belong.
Lastly, I wanted to complete this wall with an Elfa wall and door unit. The unit will hold cleats, flip-flops, and shoes used for yard work.
There are so many ways to customize a wall and door rack. First, you pick a standard the length you need. Then you decide what racks or baskets to snap onto the standard. We used shoe racks and two small baskets.
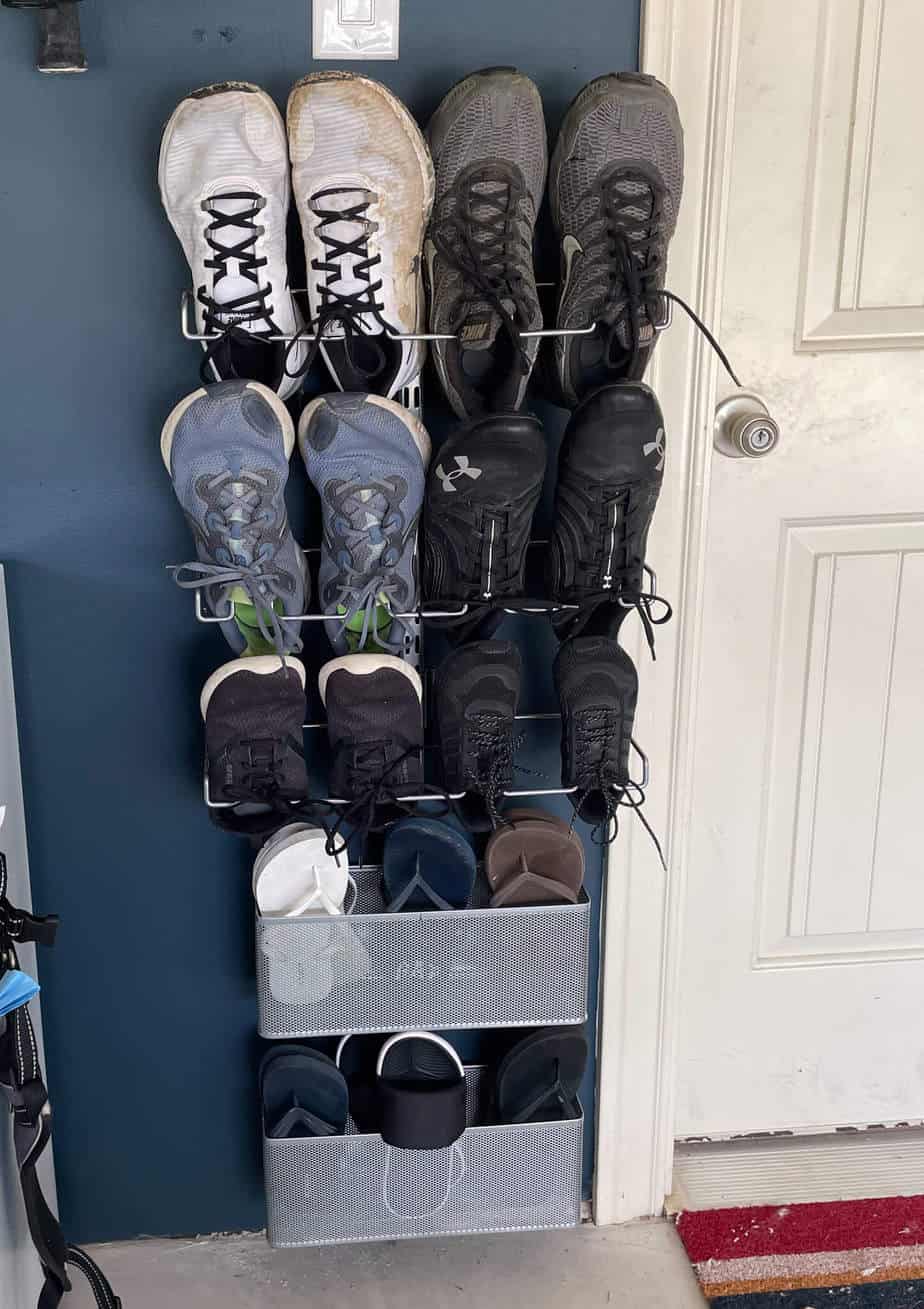
We used to have a pile in front of the door where everyone kicked off their shoes. It was a tripping hazard and quite annoying. The shoes now have a tidy home.
Solution #4- Ceiling Mounted Storage Rack
The last vertical storage unit I want to share is this ceiling-mounted storage rack. This rack holds A LOT of weight. We store our entertaining tables and a few more bins up there.
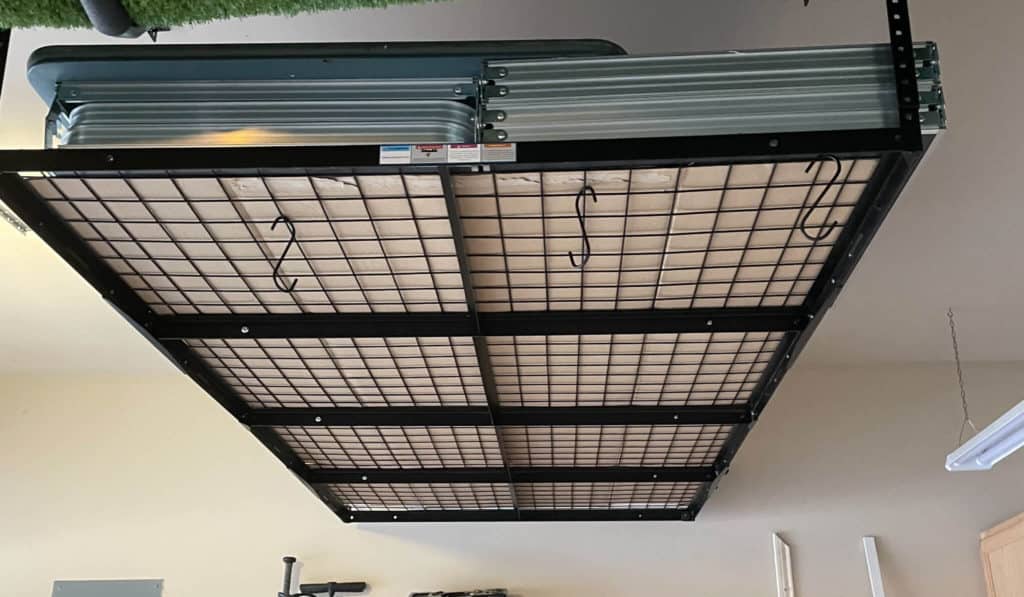
We only use the tables for garage sales and parties. So, we don’t need to access the unit very often. It is another great vertical storage solution for people who want things off the floor. It’s also another option for people who don’t have great attic space.
I hope this post has inspired you to get your items off the garage floor. Being able to find your stuff quickly makes things less stressful. It truly creates a sense of peace when the clutter is out of sight, but you know exactly where it is.
Do you store a lot of things in your garage? Can you find what you need at a moment’s notice? Share in the comments.
Thanks for reading!